When you’ve hung countless pictures, mounted shelves, or dealt with the aftermath of furniture mishaps, wall holes become an inevitable reality of home ownership. For years, I religiously reached for spackling compound and putty knives, resigned to the tedious process of filling, sanding, and repainting. That changed completely when I met Marcus, a veteran plasterer with over twenty years of experience, who demonstrated a technique so elegant it seemed almost magical.
The revelation came during a kitchen renovation when Marcus casually fixed a series of cabinet mounting holes in seconds, leaving absolutely no trace they’d ever existed. No filler, no sanding, no touch-up paint required. The wall looked pristine, as if those holes had never been drilled. When I pressed him for details, he smiled and said this technique had been passed down through generations of tradesmen, but most homeowners never learn it because it requires understanding how drywall actually behaves under specific conditions.
Understanding the Science Behind Invisible Repairs
The traditional approach treats holes as voids that must be filled, but Marcus explained that small holes in drywall can actually be encouraged to close themselves through controlled manipulation of the paper facing and gypsum core. The key lies in working with the material’s natural properties rather than against them. Drywall consists of a gypsum plaster core sandwiched between thick paper layers, and when you understand how these components respond to moisture and pressure, you can essentially convince the wall to heal itself.
This technique works exceptionally well for holes smaller than a quarter-inch in diameter, which covers the vast majority of picture hanging hardware, small screws, and minor wall damage. The process involves creating controlled tears in the paper facing that can be manipulated and sealed using nothing more than joint compound and strategic moisture application. The result is a repair that’s actually stronger than the surrounding wall material because you’re essentially creating a laminated patch using the existing wall structure.
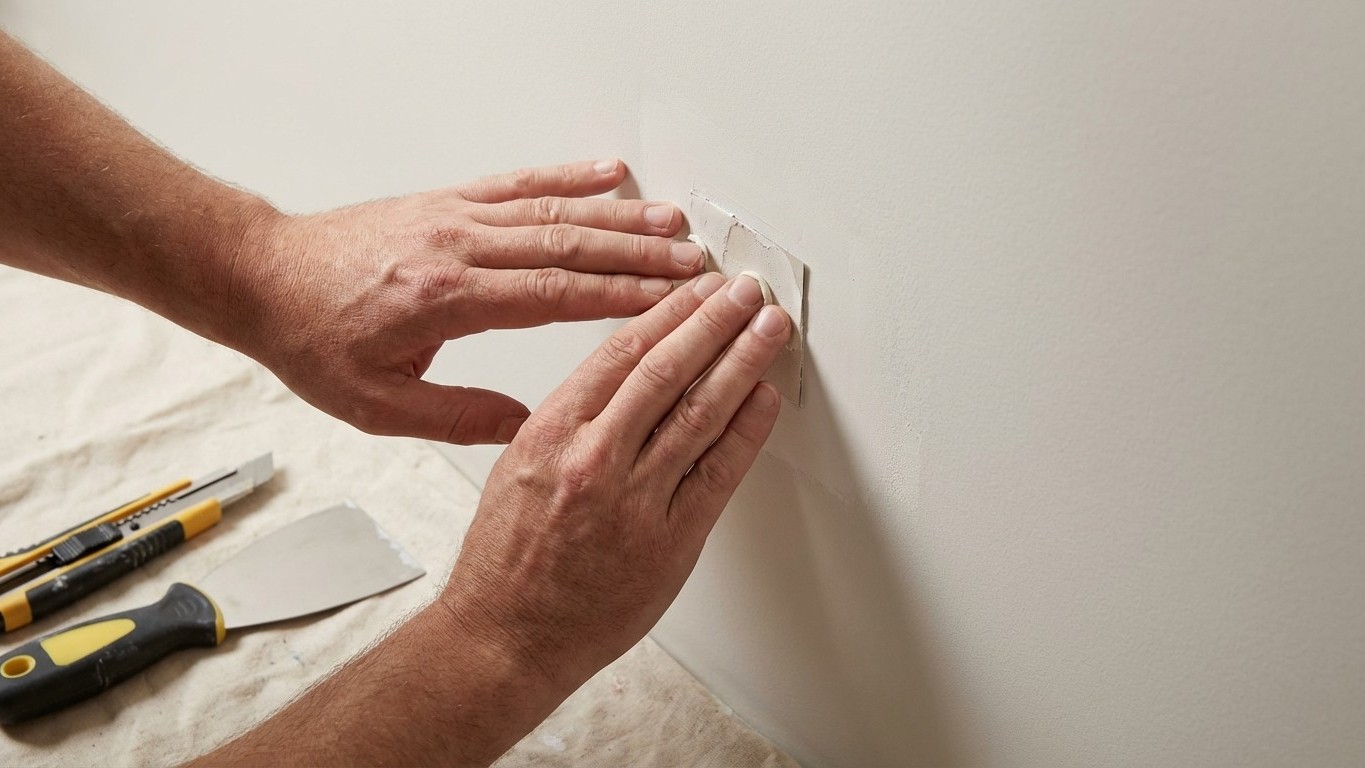
The Step-by-Step Invisible Repair Method
Marcus’s technique begins with careful preparation of the hole itself. Rather than simply slapping compound over the opening, you need to create what he calls “living edges” around the hole. Using a utility knife, make tiny radial cuts extending about a quarter-inch from the hole’s perimeter, cutting only through the paper facing without penetrating the gypsum core. These cuts should resemble the spokes of a wheel, typically four to six depending on the hole’s size.
The next step involves the controlled application of moisture. Using a small brush or cotton swab dampened with clean water, carefully moisten the paper flaps you’ve created. The goal is to make the paper pliable without saturating the gypsum underneath. This process requires patience – rushing will cause the paper to tear or the gypsum to crumble, ruining the repair. As the paper becomes flexible, you can begin working it inward toward the hole’s center, creating overlapping layers that effectively close the opening.
The final phase involves sealing this paper patch with the thinnest possible layer of joint compound. Marcus emphasized that less is definitely more here – you want just enough compound to bond the overlapped paper and create a smooth surface. The beauty of this method is that because you’re working with the existing wall texture and thickness, there’s no raised area that needs to be sanded down. When done correctly, the repair is completely flush with the surrounding wall surface.
Why This Method Outperforms Traditional Fillers
The advantages of this technique extend far beyond the obvious time savings. Traditional fillers often shrink as they cure, requiring multiple applications and creating weak spots that can crack or fall out over time. Because this method uses the wall’s existing structure as the foundation, the repair is actually more durable than the surrounding drywall. The overlapped paper facing creates a reinforced area that’s less likely to develop new holes or cracks.
From an aesthetic standpoint, the results are superior because there’s no texture mismatch to disguise. Standard repairs often require feathering out compound over a wide area to blend with existing wall texture, then careful primer and paint application to achieve color matching. With Marcus’s method, the original wall texture remains intact, and often no repainting is necessary at all – a significant advantage when dealing with custom paint colors or aged walls where new paint would stand out.
The technique also proves invaluable for rental properties or situations where you need to restore walls to their original condition. Unlike traditional patches that can be detected under certain lighting conditions or through careful inspection, these invisible repairs truly disappear. This makes the method particularly valuable for security deposit recovery or when selling a home where wall condition plays a role in buyer perception.
Mastering the Professional Touch
Success with this technique requires developing a feel for the materials and understanding the subtle cues that indicate when each step is complete. The paper should feel like soft leather when properly moistened – pliable but not soggy. The compound application requires a light touch and quality tools; a flexible putty knife or taping knife works better than rigid alternatives because it allows you to follow the wall’s natural contours.
Marcus stressed the importance of working in good lighting to assess your progress accurately. What looks perfect under overhead lighting might reveal imperfections when viewed from different angles or under natural light. Taking time to examine the repair from multiple positions before considering it complete prevents the disappointment of discovering issues after the compound has dried.
This revelation completely changed my approach to wall maintenance. Instead of viewing holes as major repairs requiring trips to the hardware store and weekend projects, they’ve become simple five-minute fixes that leave no evidence of damage. The confidence that comes from mastering this professional technique has made me more willing to hang pictures, try new arrangements, and generally treat my walls as the dynamic surfaces they should be rather than pristine monuments to be preserved at all costs.