The Critical Error That Turns Simple Projects Into Costly Disasters
Picture this: you’re hanging a new shelf, mounting a TV, or installing a mirror. Everything seems straightforward until your drill bit starts wobbling, the hole becomes oversized, or worse yet, you hit something you definitely shouldn’t have. Choosing the wrong drill bit for the material being drilled is one of the most common mistakes DIYers make, and it can result in loose or wobbly holes, damage to the material, or excessive vibrations. What should have been a 15-minute task suddenly becomes an expensive repair job.
The frustrating reality is that most drilling problems can be traced back to using the wrong bit for the job. This isn’t just about grabbing any drill bit from your toolbox—it’s about understanding that different wall materials require completely different approaches. When DIYers ignore this fundamental principle, they’re essentially setting themselves up for failure Before they even start drilling.
The consequences extend far beyond a simple do-over. Using the wrong bit can damage your walls, break expensive fixtures, waste costly materials, and in worst-case scenarios, hit electrical wires or plumbing lines hidden behind the surface. One of the main reasons drilling into walls can be dangerous is that you risk hitting electrical wires or gas and water pipes, with wires often connecting vertically and horizontally behind outlets and sockets, potentially leading to electrocution.
The Science Behind Why Wrong Bits Fail So Spectacularly
Understanding why the wrong drill bit creates such problems requires looking at the fundamental differences between wall materials. Stone, asphalt, masonry, and breeze blocks are abrasive materials that will damage steel or metal drill bits, and once used on masonry, these bits will have their edge abraded and dulled, making them ineffective on steel, brass, aluminum, plastic, or wood afterward.
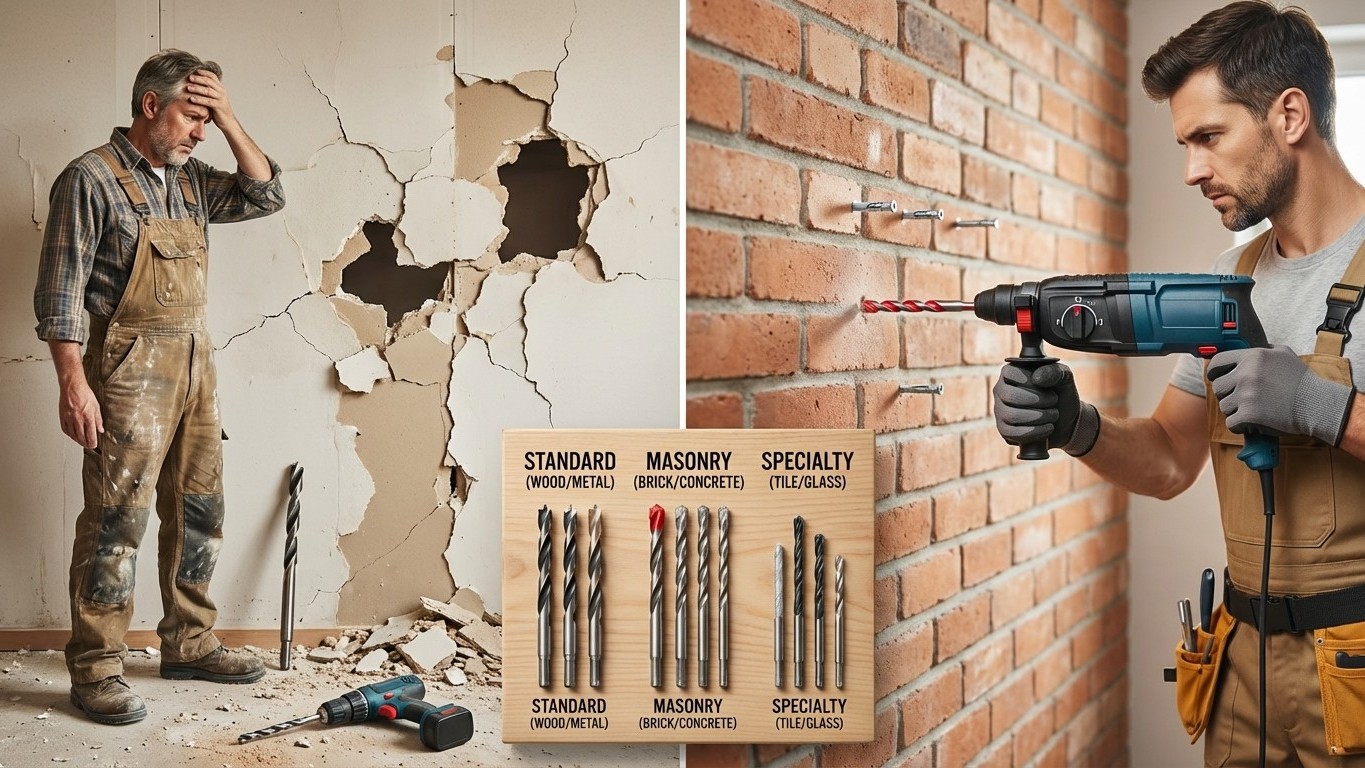
Each drill bit type is engineered for specific material properties. Standard twist bits work beautifully on wood and soft materials because they’re designed to cut fibers cleanly. But take that same bit to concrete or brick, and you’re asking it to perform a task it was never designed for. Masonry surfaces are dense and abrasive, and standard bits won’t even scratch them—this is where carbide-tipped masonry bits come in, with durable, heat-resistant tips designed specifically for hammer drills.
The problem compounds when DIYers apply more pressure to compensate for an ineffective bit. Using the wrong drill bit can result in inefficient drilling, overheating, and damaged materials. This creates a cascade of problems: overheating dulls the bit faster, excessive pressure can crack delicate surfaces like tile, and the lack of proper cutting action often results in wandering holes that miss their intended target entirely.
Matching Your Bits to Your Walls: The Professional’s Guide
Professional contractors know that successful drilling starts with material identification. Concrete and masonry walls demand dedicated masonry bits, typically tipped with tungsten carbide for extra hardness, while drywall or wood framing behind plaster calls for twist or HSS (High-Speed Steel) bits, designed to deliver clean cuts with minimal tear-out.
For drywall projects, which represent the majority of indoor mounting tasks, standard twist bits or multipurpose HSS bits provide the clean holes you need. These materials are relatively soft and forgiving, but using a masonry bit on drywall is overkill and can actually create larger, less precise holes than necessary.
When dealing with exterior walls or basement projects involving concrete and brick, the stakes change dramatically. For masonry work, use a hammer drill or rotary hammer for best results, and start with a smaller pilot hole before enlarging. The carbide tips on masonry bits can withstand the impact action of hammer drills, while standard bits would shatter under the same conditions.
Tile drilling represents perhaps the most unforgiving scenario. These materials are brittle, and the wrong bit can crack or shatter them instantly—diamond-coated bits provide precise, smooth drilling without excessive pressure, while spear-tip bits are designed specifically for tile and glass with a sharp, pointed end.
The Smart DIYer’s Strategy for Avoiding Costly Mistakes
Prevention starts with proper planning and the right tools for your specific project. Before you even pick up your drill, take time to identify your wall material accurately. It’s super important to know what’s behind your wall—you don’t want to accidentally drill into a wire or a pipe—so get hold of a good quality stud finder which can also detect pipes and wires.
Build a basic collection of material-specific bits rather than relying on “universal” solutions. While all-purpose bits exist, they represent compromises that often lead to suboptimal results. A modest investment in the right bits pays for itself by preventing damage and ensuring clean, professional-looking installations.
Keep your holes to a maximum depth of around 1 inch to 1⅛ inches to avoid hitting wires or plates, and if you encounter heavy resistance while drilling, you may have encountered protective plates and should stop drilling immediately. Modern building codes require protective steel plates around electrical and plumbing lines, so resistance often signals you’re approaching something you shouldn’t penetrate.
Finally, consider the drilling technique itself. Start at a slower speed and gradually increase if needed—don’t start at high speed as this can pose a safety hazard and could ruin your work. Proper speed control, combined with steady pressure and the right bit, transforms drilling from a nerve-wracking gamble into a predictable, controlled process.
The difference between a successful DIY project and a costly disaster often comes down to this single decision: choosing the right drill bit for your specific wall material. Take the time to identify your walls, invest in quality material-specific bits, and approach each project with the respect it deserves. Your walls—and your wallet—will thank you.