
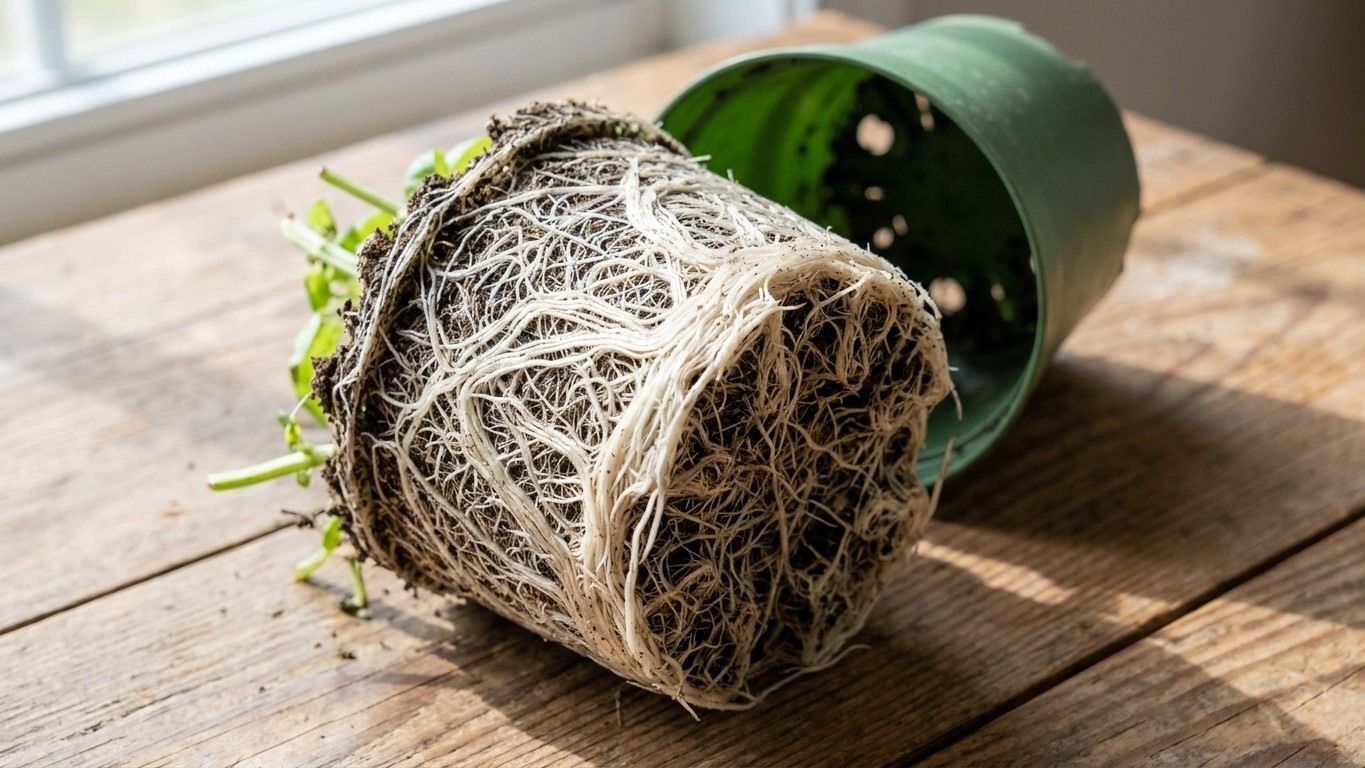
The plant looked perfectly fine at the store. Lush, deep green, practically bursting with promise. Three days later, it was a drooping, blackening mess on your windowsill, and you were already wondering if you’d watered too much, too little, or if you’d just been unlucky again. The truth is, it was never really about you.
Key takeaways
- What you discover when you tip that perfect-looking basil out of its pot will shock you
- The mysterious blackening and wilting isn’t your fault—the damage was already done at the greenhouse
- One simple technique transforms a dying supermarket plant into 10 healthy, long-lasting herbs
The secret packed inside that innocent little pot
Tip a supermarket basil out of its plastic sleeve and the discovery is immediate: the root ball is a dense, tightly compressed tangle, not a single plant but a colony competing for survival in a space roughly the size of a coffee cup. One pot typically contains 10 to 20 seedlings grown in close proximity purely for quick visual appeal. That lush, abundant look you see on the shelf? Growers pack the herbs in tight so the pots look full and abundant at the store, but they aren’t grown with the idea of longevity in mind.
The pots of herbs you find at the supermarket are designed to die. It wasn’t over- or underwatering that did it. Basil, coriander, and even thyme aren’t meant to last more than a couple of weeks. So every time you blamed yourself for killing another pot, you were solving the wrong problem. The plant was already on borrowed time before it hit your kitchen counter.
There’s also a secondary issue that never gets talked about. Live herb plants from the supermarket start their lives in very controlled conditions, everything about their early life is monitored, from humidity to temperature, moisture, and nutrients. It’s a commercial greenhouse method that produces lush green growth and supermarket standards, but not hardiness. Bringing one home is essentially asking a sheltered plant to adapt to a completely new environment overnight. Basil plants are normally grown in a greenhouse; taking them out of those surroundings and placing them in your house forces them to adjust, which they do not always survive.
What’s actually going on at root level
Basil simply can’t survive in such crowded conditions, as the roots have hardly any access to water or nutrients because there’s so little substrate. Picture a marathon runner trying to sprint in a closet with 15 other people. That’s what the roots are doing. The soil that comes with store-bought basil is very poor, with just enough fertilizer to get the plant to your house. Once those nutrients run out, the plant starts to wilt.
There’s another layer to this that even seasoned herb growers miss. About 90% of commercial sweet basil cultivars lack genetic resistance to downy mildew, unlike more robust red, lemon, or spice basil types. And if cold is involved during transit, the damage is already done before you see it: basil is highly cold-sensitive and begins to suffer moderate chilling injury when stored at 7–10°C, leading to leaf blackening and collapse after purchase. That mysterious blackening after a single night near a drafty window? Not your fault. The plant was already stressed.
When you slide the root ball out and look at what’s underneath, you also get a diagnosis. Healthy roots should have a light white color. Dark and moist roots often indicate rot, a sign that drainage was insufficient and the plant was overwatered. If you see white and firm, you still have time to save this thing.
How to actually rescue it (one plant becomes many)
The fix is disarmingly simple, and it turns one $3 pot into a small herb garden. Divide the pot up into two or three different containers with fresh soil. Unpot the herb and gently pull the roots apart with some stems attached, then repot them in individual four- to six-inch containers filled with soil. You’re not saving a plant, you’re liberating 10 of them from each other.
Begin by taking the basil out of the pot and gently pulling the root ball into two pieces. In reality, you’re going to have to rip through some roots. Using a slow but firm action helps minimize damage. Handle the compost and roots, not the stems themselves. Some of the young plants will be bigger and stronger than others, those are the ones to grow individually. Gently pull and tease the larger plants out, and use the smaller ones for your next meal. That’s not waste; that’s dinner plus a long-term supply.
Once repotted, pinch off the growing tips. Removing them makes the plant focus on developing a good root system, and the bonus is that you can use all those growing tips to make a fresh pesto that very day. It also encourages a stronger, bushier plant. After repotting, place the newly repotted basil in a warm area with bright, indirect light and avoid full sun for the first 3 to 5 days to prevent transplant shock.
Keeping it alive once it’s established
Watering is where most people stumble a second time. The trick is simply to water your basil from the saucer and never from the top. Bottom watering encourages roots to grow downward in search of moisture, building exactly the deep root system the supermarket pot never allowed. Basil roots are sensitive, and when the soil stays moist, they risk drowning from lack of oxygen. Consistently soggy soil also invites fungi that cause leaf spots, wilting, and other diseases.
Light is non-negotiable. Basil loves light and requires full sun. If growing indoors, use the south side of your house and make sure the plant has at least 6 hours of direct sunlight. On harvesting: avoid plucking leaves individually, as this can stress the plant. Instead, use scissors to cut whole stems, this encourages the plant to branch out and grow more leaves, delaying the flowering process, which diverts energy away from leaf production.
One detail worth knowing if you want basil through the colder months: basil is an annual plant, which is why it naturally dies back in winter regardless of how well you’ve cared for it. The antidote is propagation. Stick a stem in water and within a few days or weeks you’ll notice roots growing. You can leave it in water or pot it up with a few more cuttings, and you’ve got yourself a new plant, all from what was originally a $3 grocery store purchase destined for the compost bin by Tuesday.
Sources : cookist.com | amazingherbgarden.com