
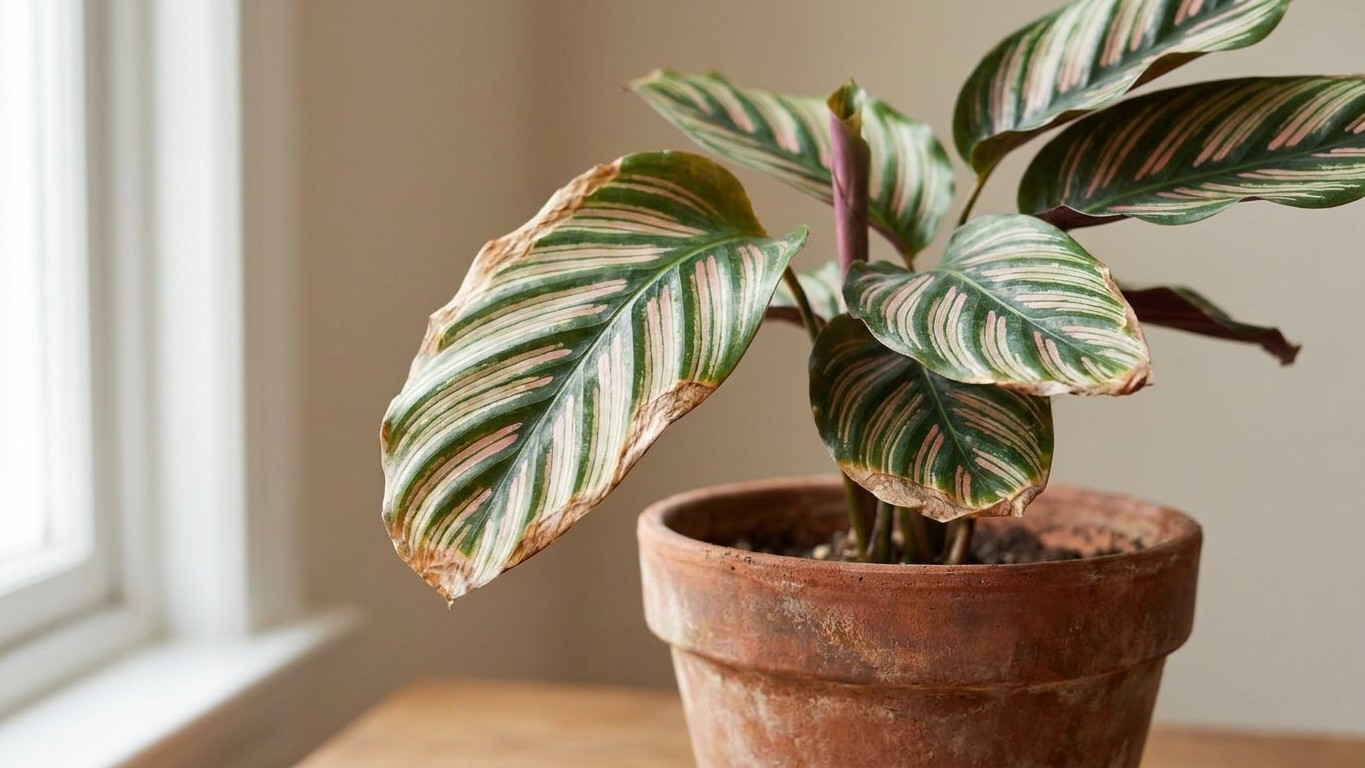
Terracotta has a good reputation. Breathable, natural, affordable, every plant forum seems to agree it’s the gold standard for tropical houseplants. So when a calathea started showing crispy leaf edges, most people blame themselves: not enough humidity, too much direct light, tap water with chlorine. The pot never comes under suspicion. It should.
Calatheas are native to the floor of South American rainforests. Their roots have never, in millions of years of evolution, touched anything that pulls moisture away from the soil. Terracotta does exactly that. The porous clay absorbs water constantly from the surrounding mix, accelerating evaporation through its walls. For a drought-tolerant succulent, this is a feature. For a calathea, it’s a slow form of stress that shows up first as brown, crispy margins on otherwise healthy-looking leaves.
Key takeaways
- Terracotta absorbs water through its walls, drying soil 30–50% faster than plastic or ceramic under identical conditions
- Crispy leaf edges appear weeks after the damage has already started at the root level, making them nearly impossible to fix with misting alone
- A simple plastic nursery pot inside a decorative outer container gives you the aesthetic without fighting the pot’s inherent thirst
What terracotta actually does to soil moisture
A standard 6-inch terracotta pot can lose a measurable amount of moisture through its walls every day, not just through drainage and surface evaporation. Studies on container horticulture have measured soil drying rates up to 30–50% faster in unglazed clay compared to plastic or glazed ceramic under the same conditions. For most plants, that’s manageable. For calatheas, which want consistently moist (not waterlogged) soil, that difference is the margin between a thriving plant and one that looks perpetually stressed.
The crispy edges are the first sign. They start at the tips, move inward along the margins, and no amount of misting fixes them because misting addresses air humidity, not root-zone moisture. By the time the leaf edges are visibly brown, the roots have already cycled through multiple episodes of drought stress that the surface of the soil didn’t even hint at. The top inch felt fine. The walls of the pot were silently doing the opposite.
There’s a secondary issue too: calatheas are sensitive to mineral buildup. Terracotta, because water moves through its walls and evaporates from the outside, pulls dissolved minerals out of the soil and concentrates them at the root zone. Tap water with even moderate mineral content accelerates this process. Those white crusty deposits you sometimes see on the outside of a terracotta pot? That’s mineral salt that migrated through the clay. Some of it stays inside, in the soil, around the roots.
The pot materials that actually suit calatheas
Glazed ceramic solves the porosity problem while keeping the weight and aesthetic appeal of clay. The glaze seals the walls, stops lateral moisture loss, and doesn’t change the drainage behavior through the bottom hole. Many growers who switched from terracotta to glazed ceramic reported a noticeable reduction in leaf crisping within a single growing season, not because they changed anything else about their care routine.
Plastic gets a bad reputation in plant circles, mostly for aesthetic reasons. But it is genuinely one of the best materials for moisture-sensitive tropicals. It holds water in the soil longer, doesn’t absorb minerals, and is lightweight enough to make repotting easier. Nurseries grow calatheas in plastic for a reason. The argument that plastic “doesn’t breathe” is only relevant if overwatering is the primary risk, for calatheas, underwatering and uneven moisture are the bigger threats.
A practical middle ground: use a plastic nursery pot inside a decorative outer pot (a cachepot). You get the look of whatever vessel you want, the roots stay in an environment suited to them, and you can water based on actual soil conditions rather than fighting the pot’s own thirst. This is not a compromise. It’s how most professional growers handle decorative containers.
What to change if you’re already using terracotta
Switching pots immediately isn’t always necessary. If the terracotta is relatively new and the crisping is mild, two adjustments can slow the damage significantly. First, water more frequently and check moisture at root depth, not just at the surface, a chopstick or moisture meter inserted 2–3 inches down gives a far more accurate read. Second, consider lining the inside of the terracotta pot with a thin plastic bag or sheet with the drainage hole cut out. This creates a barrier that dramatically reduces wall absorption. Inelegant, yes. Effective, absolutely.
If you want to keep the terracotta for its look, soaking the pot in water for 24 hours before planting saturates the clay and slows its initial absorption rate. The effect fades over weeks as the pot dries out during normal use, but it buys time and reduces the shock of the first few watering cycles. Some growers also paint the interior with a water-based sealant, the same logic as glazing, done at home.
Humidity still matters, by the way. A pebble tray with water beneath the pot, or grouping plants together, raises local humidity without the inconsistency of misting. Calatheas want ambient humidity above 50% ideally, and while fixing the pot won’t replace that, it removes one of the variables stacking against them.
The real lesson buried in this mistake
General plant advice tends to flatten specifics. “Terracotta is breathable and good for plants” is true for a category of plants, not all plants. Calatheas sit in a group that includes most marantas, fittonia, nerve plants, and ferns, all of which share a preference for consistent moisture and would suffer the same fate in the same pot. The advice that works for pothos and snake plants gets repeated until it sounds universal. It isn’t.
One counterintuitive detail worth keeping in mind: calatheas bought from a garden center have often been growing in conditions far more humid and controlled than a typical home. The brown edges that appear weeks after purchase are sometimes blamed on the transition from greenhouse to home environment, and humidity is usually the suspect. But if that calathea was also moved into a terracotta pot on arrival, the pot was compounding the stress from day one, and separating the two causes took longer than it should have.