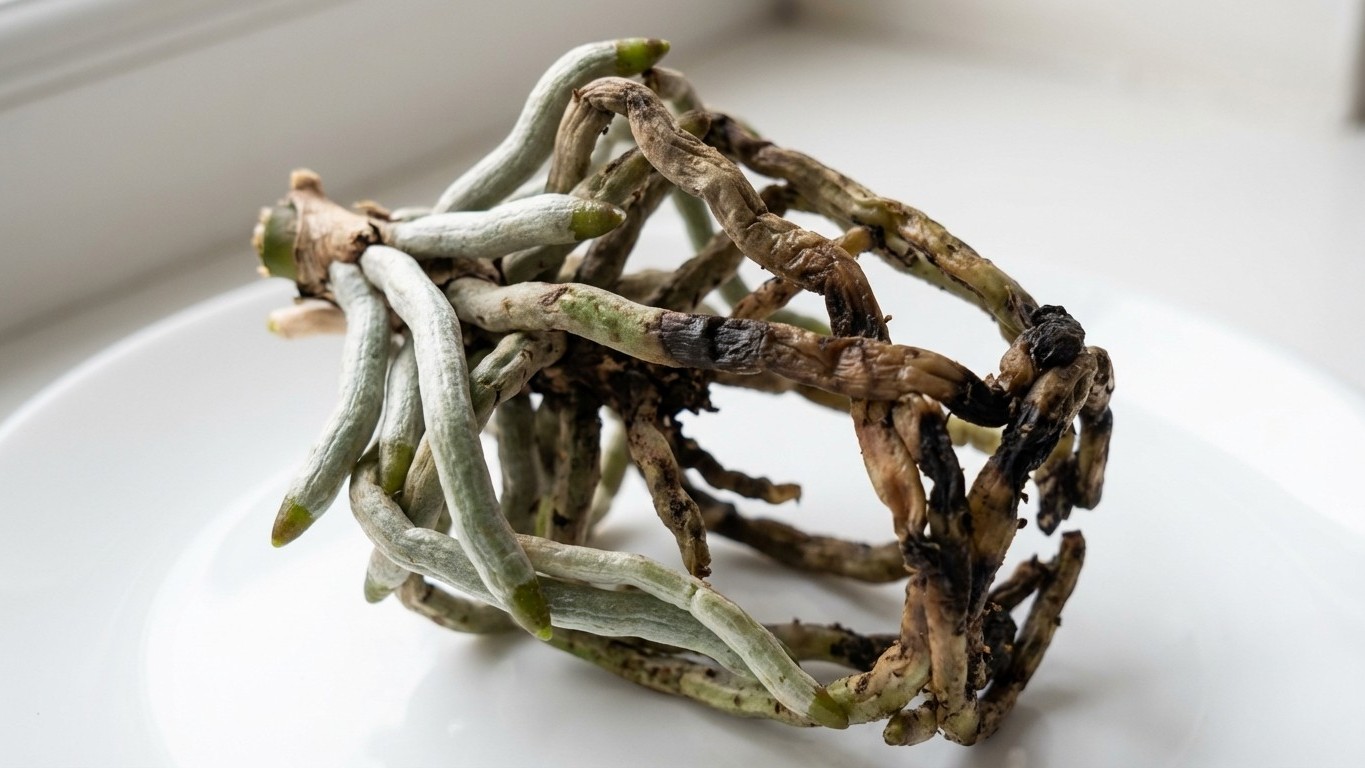
Twenty-one days. That’s all it took. The leaves were glossy, the stem was upright, the flower spike still carrying two open blooms, everything above the soil looked picture-perfect. Then I slid the plant out of its plastic nursery pot and found a matted, brown, soggy mess where healthy roots should have been. Half the root system had collapsed into rot, and the other half was on its way there. The culprit wasn’t neglect. It was the wrong soil, doing its quiet damage in the dark.
Key takeaways
- Your orchid’s gorgeous leaves can hide months of root damage happening silently underground
- Standard potting soil is a death trap for orchids—but you won’t see the consequences for weeks
- Transparent pots and one specific material can save your plant from the rot cycle forever
What potting mix actually does to orchid roots
Most orchids sold in garden centers, the vast majority being Phalaenopsis, the classic moth orchid, are epiphytes. In their natural habitat across Southeast Asia and tropical forests, they grow attached to tree bark, not buried in earth. Their roots are designed to be exposed to air, to dry out between rain events, and to absorb moisture rapidly when water is available. Put those same roots into standard potting soil, the kind you’d use for a pothos or a peace lily, and you’ve effectively placed a marathon runner in a cast.
Dense soil traps moisture against roots that evolved to drain fast. Within days, that constant wetness creates anaerobic conditions, a low-oxygen environment where fungal pathogens like Fusarium and Pythium thrive. The velamen, the spongy white outer layer of orchid roots that gives them their silvery-green appearance, begins to break down. What starts as slight discoloration at the root tips progresses to full blackening, then to that characteristic mushy texture that falls apart when you touch it. Three weeks is more than enough time for this process to advance significantly, especially in warm indoor conditions.
The deceptive part is the foliage. Phalaenopsis store water and nutrients in their thick, fleshy leaves. For weeks after root rot sets in, the plant draws on those reserves. The leaves stay turgid and green. The flower spike continues its business. On the surface, nothing signals distress. That’s why so many orchid owners discover the damage too late, they only look when they’re repotting, which many people do infrequently.
How to assess the damage and what to do next
Pulling the plant free and confronting a rotted root system is jarring, but it’s recoverable, provided you act immediately and correctly. The first step is a cold assessment. Healthy orchid roots are firm and greenish-white; when moist, they turn bright green. Dead roots are brown or black, soft, and hollow-feeling. Roots that are brown but still firm may just be dehydrated or dormant, not dead.
Sterilize a pair of scissors or pruning shears with isopropyl alcohol, this step skipped by beginners is how rot spreads further during the rescue operation. Cut away every root that is soft, mushy, or fully brown, going back to tissue that looks clean and firm. If the rot has traveled to the base of the stem, that’s a harder problem. But in most cases, especially where the damage is caught before the foliage shows symptoms, enough viable roots remain to work with.
After cutting, dust the wounds with powdered cinnamon or activated horticultural charcoal. Both act as natural antifungals. Leave the plant bare-root on a clean surface for several hours, or even overnight, to let the cut surfaces callous over. Replanting into wet medium immediately is the most common mistake people make at this stage, you’re recreating the same anaerobic conditions you just rescued the plant from.
The medium that actually works for orchids
The replacement medium matters as much as the rescue operation. Coarse fir bark, sold specifically as orchid bark, remains the most widely used option because it mimics the airy, fast-draining environment of tree bark. Chunks in the range of medium grade (roughly half an inch to an inch in size) allow air circulation around roots while still retaining a small amount of moisture between watering. Bark does break down over time, typically 18 to 24 months, which is why repotting is a necessary part of orchid care, not an optional one.
A growing number of growers, including specialists who compete in orchid societies, have shifted to semi-hydroponic methods using LECA (lightweight expanded clay aggregate). The clay balls wick up water from a small reservoir at the bottom of the pot while keeping roots in humid but oxygenated conditions. The learning curve is steeper, but the margin for error is wider once you’ve got the water level calibrated. Roots grown in LECA often look dramatically healthier than their bark-grown counterparts, thick, green, actively branching.
Transparent pots deserve a mention here. Orchid roots photosynthesize. That’s not a metaphor, they contain chlorophyll and actually contribute to the plant’s energy production, particularly in low-light conditions. Growing in a clear plastic or glass container lets light reach the roots and also allows you to monitor their condition without disturbing the plant. A quick visual check every few days can catch the earliest signs of trouble, slight softening, unexpected discoloration, before 21 days of silent damage accumulates.
One underappreciated detail: fresh bark should be soaked in water for 24 hours before use and then allowed to drain fully. Dry bark repels water initially rather than absorbing it, meaning your first few waterings pass straight through without actually hydrating the roots. Pre-soaking solves this, and it also flushes out tannins that can slightly acidify the medium over time.